Translate

Showing posts with label Member Projects. Show all posts

Tuesday, October 25, 2011

Bedded Down

The Dollhouse Miniprojects Group recently completed a canopy bed project. The directions were clear and easy to follow, and each member completed the project a little differently.

Dee planned and set the task, and this is her prototype bed. She is planning a Christmas bed, and the lace will be changed to green. She is also planning a dressing table for the group to accompany those completed beds.


Kaye Smith from Tasmania was first to finish her pretty Purple bed.


Then she went on to make pillows to round out the project

Doreen Playter adapted the prototype and used lace trim to simulate carved wood trim.
Doreen's bed even has linens underneath!
See her blog at Doreen's Miniatures and Memories


Marjorie from California wrote about her Tudor bed:
I used paper doilies to replicate carvings on the headboard and footboard. I used Minwax gel stain to do the wood as well as the paper doilies. I am happy with the way it turned out. The cross stitched coverlet I purchased along with the pillow at the Good Sam Show in 2010. I am going to remake the pillow - it is too large and stiff.

Here is Marjorie's finished bed.


Then Joyce Holland wrote a hilarious post about her bits of rubble! She had followed Dee's directions to the letter, and when she was trying to apply the rubber band as a clamp the whole thing fell apart! (The glue needs to set a bit and the band needs to be rather loose. Make a loop, insert a stick and tighten tourniquet style.)

Joyce is still working on her bed - pics to come!

This is Linda's bed. She cut a long strip of cardboard and wrapped it with a strip of fabric to create the striped trim.


Joyce Holland's bed is delicate and very feminine.


All so different, but started from the same basic plan.

Thursday, May 19, 2011

Duracraft Farmhouse 505

Raven Scott has completed this wonderful farmhouse and posted pictures to her album in the Little Roomers group.


What a charming project!

Higgins General Store

A new member, Raven Scott, posted pics to her general store in the group photo album.
This is a shot of the outside.

The sidewalk has moss growing in the cracks, and a gumball machine is at the front entrance.
On the right hand side you can see the notions department.

Inside there is a tempting selection of sewing needs.

This is the lower shelf:

This is the grocery section:

And you really must have a bathroom, so an extra room was built onto the back of the store.

An HBS nightstand was bashed to make the sink unit, and Sculpey clay used to make the sink and the bathroom mirror.
Of course, a general store must sell tools:

Note the weigh scale and paper bags!

Outside, to the right is a vegetable stand.


With vegetables

Lots of attention to detail here.

Wednesday, May 18, 2011

Cheesy!


*** Tanya has been so generous sharing all her projects, which has made us all so grateful.  It shouldn't be necessary to say this , but they are not for others to make and profit from! Please note they are for PERSONAL USE ONLY!!  If you wish to sell. please have the courtesy to contact her first.


Once again, Tanya has come up with a unique project!

Cheese Balls by Tanya
McKibben
What you will need:

  • Nail Polish Kit Party Favors – 4 Pack (found at Hobby Lobby)
  • Cap from thingie found in pharmacy medicine bottles to keep medicine fresh (Top of canister) If you don’t have any of these you could probably use a large brad Gazz-It modeling beads – found at Dollar Tree Tacky
  • Glue (to glue label and top to canister)
  • Printer to print label for cheeseballs off the internet (Do a Google search for UTZ Cheeseballs)
Instructions:
  1. Open polish bottle, cut the stem off with utility scissors. Empty contents out. You will have to stick some type of stick inside the bottle to get the polish flowing out. Run hot water inside the bottle until all contents is out and bottle is clear. Let bottle dry completely.
  2. Open your container of Gazz-It beads and take out enough to fill the nail polish bottle. Put the Gazz-It beads on clean piece of cardstock or paper or whatever you choose.
  3. Pour a small amount of orange paint onto the paper then take a paintbrush and cover the Gazz-It beads all over until completely covered in orange paint, let dry. Fill container up with the Gazz-It beads all the way to the top.
  4. Paint the cap of your canister the same color as the real life product. I used a purple paint pen and the paint stuck very well to the plastic cap. Once it is dry glue the cap on the canister with Tacky Glue.
  5. Once you have found your label on the internet via Google, copy and paste it to MS Word and resize it. If you can’t find the label I have it and can send it to you upon request. After you have resized your label and cut it out, glue it to your container of cheese balls and you are all done. If you decide to make one of these I would love to see pictures. If anything is not clear to you, please don’t hesitate to email me at teecrafty2000@ yahoo.com. Enjoy!

Tuesday, February 15, 2011

Valentine's Day

Tanya made this fabulous scene for Valentine's Day....

Don't it just make you all warm and fuzzy?
Here is a link to her Picturetrail album:
http://www.picturetrail.com/sfx/album/view/7251673

Sunday, January 9, 2011

Yule Tide Shop


Sandra from Sydney wrote:
Our son Nathan gave me the Petite Properties Yule Tide shop for Christmas.
I painted the walls and completed the floors with strips of paper for floorboards as instructed in the Petite Properties for the first two kits by Petite Properties.
Corner Shop and Washtub Cottage.
This is the link to Sandra's blog - http://snippetsfrommystudio.blogspot.com/
To see the corner shop and washtub cottage, scroll to the very bottom.

Friday, January 7, 2011

The Hole in the Wall Pub


Tanya has done it again!
Check out her fabulous pub....
http://www.picturetrail.com/sfx/album/view/5815043

Monday, August 2, 2010

Glenna is a Star!


Glenna was featured on the Greenleaf site as member of the month!
Congratulations!
Here is a link to her albums
http://www.greenleafdollhouses.com/forum/index.php?autocom=gallery&req=user&user=1021

Saturday, July 31, 2010

A Camping we will go!


Check out Doreen's Coleman stove!
http://doreensminiatures.blogspot.com/2010/07/coleman-stove.html


Cant go camping without sleeping bags!
http://doreensminiatures.blogspot.com/2010/07/sleeping-bags.html

Doreen is so inventive and her FP family is having so much fun!

Tuesday, June 8, 2010

Laundry Sink


Susan made this fantastic laundry room in a soap box. She has a post showing how to make the sink unit on her blog:
http://minicrochetmad.blogspot.com/2010/06/laundry-sink.html

Monday, October 26, 2009

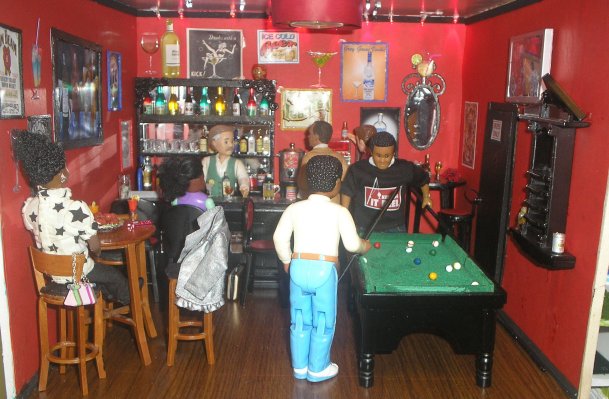
Tanya's Hairdressing Salon

Once again, Tanya has managed to pull together a breathtaking scene with T2T style.
She does such a wonderful job that everyone who is let in on her secrets marvels at her astonishing talent for invention.

From this:


To This:

Some transition! Some smart cookie!
http://www.picturetrail.com/sfx/album/view/17115956

Wednesday, May 27, 2009

Tanya's Shop

Once again, Tanya is working on a genius project - a modern-day ladies shop. See her Picturetrail album for more clothing and her belt display rack. Need I say it again ? Genius!
http://www.picturetrail.com/sfx/album/view/7251673


Thursday, May 21, 2009

Susan Munro's Mother's Day Tray

The South African Minis group had a contest - to submit pictures if mini Mother's Day trays.
All of the entries were stunning.

This is Susan's entry - notice the teapot and the toast soldiers! Great job!


Check out her Flickr album for more!!
http://www.flickr. com/photos/ wawamum/

Thursday, May 7, 2009

Chris' Appliances in 1/4 Scale


Chris in Canada made these appliances in ¼ Scale.
She says: I made the basic shapes from 1/2" square balsa lumber and the stove console from 1/16" basswood stripwood glued to the back. I sanded the balsa into the shape I needed, and embossed it to indicate the doors etc.... then gave everything 2 coats of ModPodge matte finish to harden the surface so the balsa wouldn't dent with handling and to seal the grain of the wood. The stovetop burners are a printie I made up and coated with ModPodge, the oven window is a bit of grayish-black paper from a sales flyer in a frame of chrome auto detailing tape and all the handles are cut-off pins bent into shape. The finish is 3 coats of white enamel, sanded between coats and a final clear coat. This was my first attempt at QS appliances and probably the last time I'll do something like these for a swap due to the time involved in making them, butI did enjoy doing them.

Something Borrowed, Something Blue


Barb K in Niagara wrote:
I had been planning a Wedding shop for a long time. At the Gathering (Ontario) I purchased a room box that was nicely wallpapered and already lit (from Christina Diercx
(sp) ) I also purchased a couple of wedding gowns (one from Liz and one from
Dale I believe). Then I got a lovely surprise gift in the mail on Friday from
Margaret Atkinson - a lovely trousseau set. I had been telling her about my
planned shop. So I was motivated to put it all together and I did last night. I
still have to paint the curved shelving and I'll be adding some more shelves I
think. At any rate - I call it "Something Borrowed, Something Blue".

Thursday, March 26, 2009

Tuesday, March 3, 2009

Dazzle Dress Shop


"Dazzle" Dress Shop
Still working on it but this was the Orlando Fun Day project - Feb 2009. Most of the items inside were Fun Day gifts. I will continue to finish and add my own ladies' accessories.

Salle de Bain Pour Mademoiselle


"Salle de Bain Pour Mademoiselle"
Made this elegant bathroom in a Ron Mummert workshop in Orlando, Feb 2009. I absolutely love it! Still need to finish landscaping outside the window which will be lit up like sunlight.

Sunday, January 25, 2009

Melody's Primrose Gingerbread House


Front of Gingerbread House
Made from a Primrose. The gingerbread is brown foam sheets. The icing is bathroom caulk. Most decorations are made from Fimo.


Inside the Gingerbread House
This is Santa's doll workshop.


Full inside of the Gingerbread House


Upstairs in the Gingerbread House


This is where Santa keeps his international doll collection. He sits in the red heart chair by Raine to check his list twice.
The row of dolls was little dolls off hair doodles. And the ballerina is a bead! The international dolls are off a Christmas garland I bought at a fundraiser of developing world "fair trade" crafts.


Thursday, January 22, 2009

Beach House in Progress


Janice wrote:
I've added a few photos of my beach house. As you can see, it still
needs A LOT of work, but that's the fun of doing minis, isn't it?

Most of the furniture is from the clearance bins at AC Moore, it's
not what I had in mind for the house but for $3.00 and $4.00 it was
too good to pass up. The bedroom furniture will at some point be
repainted to cover the rather scary looking cat faces but I liked
the shape of the furniture, including the dresser and nightstand
which both have nice opening drawers. The light fixture currently
on the floor on the first floor is also a clearance bin find from AC
Moore. The house still needs to be wired. The floor is my first
attempt at a wood floor from skinny sticks. I learned quite a bit
in making it, including not to pick up an open bag of sticks from
the wrong end. As soon as I buy an easy cutter I'm going to redo
the floor since another important lesson learned was to check the
sticks for warping before gluing them. The second floor will also
have a wood floor, as well as walls covered with more than just
primer.

With all the cold and snow we've been having it's nice to be able to
pretend one can feel the sun and warm breezes.

***********************
March - progress on the beach house. It now has lights, a new
floor on the first floor (have to redo the one on the 2nd floor) and
some new furniture. Still needs more work.
The wooden blinds are a window shade sample from Lowe's. I paid about
50 cents for it a couple of years ago. It's been quite some time since
I've been back to Lowe's, hopefully they still carry the samples.

The wicker furniture is a great find from a small mini show last weekend.
It's actually resin but looks so real.
I think it's from Town Square Miniatures but unfortunately
the packaging is now long gone.
I did make the mermaid. She's crocheted from quilting
thread and a 0.4mm lace hook, as is the flamingo.
The swim flippers are purchased, part of a snorkel set "By Barb." I
bought them, got home and looked at the set with my first reaction
being "I paid ... for this?" I could have MADE it! but then reality set
in, they were cheap and I'd probably still have the rubber stuck to my
fingers.


Love the bikini top hanging from the drawer knob.


The palm tree is from a swap on Littleroomers
.